How to Update File to Backup
 The File to Backup development team have made many significant improvements to the Windows desktop software over the last few months, including important enhancements to the way that File to Backup transfers data between your computer and our servers. These improvements make File to Backup faster and easier to use, and reduce the time it takes to backup and synchronize your files.
It’s important to Upgrade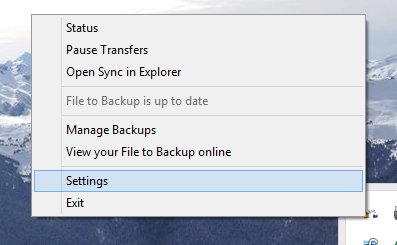
Over the next week we’re going to start removing support for older versions of our Windows desktop software, so it’s important that you upgrade to the newest version. Thankfully this is very easy – to make sure that you’re running the latest version, just follow the instructions below:
5 Step easy Upgrade Process
- Open up the File to Backup Control Panel. Just right click on the File to Backup icon next to your clock in the bottom right corner of your screen, and select Settings:
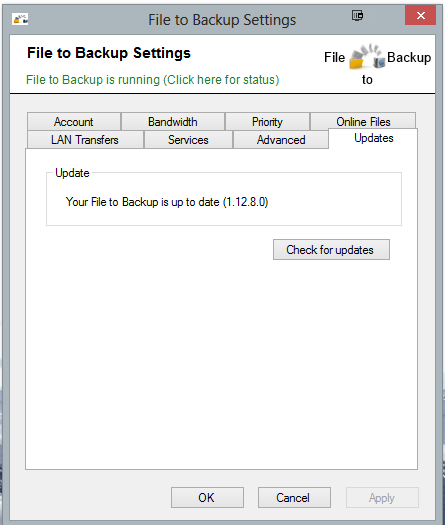
- Go to the Updates tab and click on Check for updates:
- If an update is available then it will tell you, and the Check for updates button will change to Update now:
- Click on Update now, and the newest File to Backup version will download and install – it literally only takes a few minutes and it’s all automatic:
- Once the software has installed, you will be asked to restart your computer. Save any open work, and click Yes:
Once your computer has restarted you’ll be running the very latest version of the desktop software – it’s that easy. If you have any problems or questions at all, please do get in touch – our support team are eager to help. Just e-mail us now at [email protected] and we’ll get back to you within 24 hours.